LED Install Remake v2.1 ")
Tools/Material needed
Wire cutter
Wire crimper
Wire ends
(The Above usually can be bought in a kit)
Needle Nose Pliers
10 Amp Fuse
LED light Strips 12v
Add a Fuse
Wire (18-20 gauge)
Barrier Strips
Jumper
Switch
Before you start have a plan, Determine how you want the led's to sit and look, how many LED strips you want to use. Make sure they will sit how you want them to before you start so that you know before hand if there is any placement issues. Another thing to consider is the location you want the barrier strips to sit,set,mount to. I chose the center console as it is the center and has plenty of room, Manual cars may need to adjust.
All steps are how i figured out how to wire these and may not be the best, most efficient or smartest way to do so. I cannot say i didnt blow fuses and that im an expert at the way this **** works.
I will not tap wires in my new car so this guide avoids it instead opting to add a fused connection, you can avoid all those steps by simply splicing into a 12 volt like if you wish like the cigarette lighter which i will be tapping at the fuse.
The Steps:
Step 1: Disconnect the battery (this avoids shock and destruction if you pull the wrong fuse.
Step 2. Remove applicable trim. I removed the center console trim around the gear selector, the trim below the steering wheel, and the fuse box.
To remove the trim around the gear box just simply grab the cubby below the HVAC and pull it will pop out.
To remove the trim below the steering wheel just remove all screws and then pull, clips hold it in, Beware airbag. If you dont want to you can skip this one.
To remove trim around the fuse box, find the handle and pull.
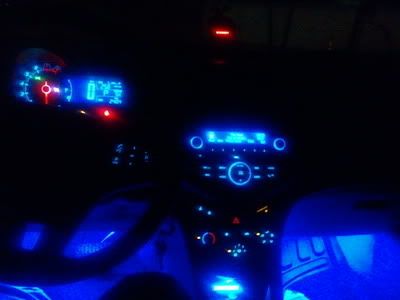
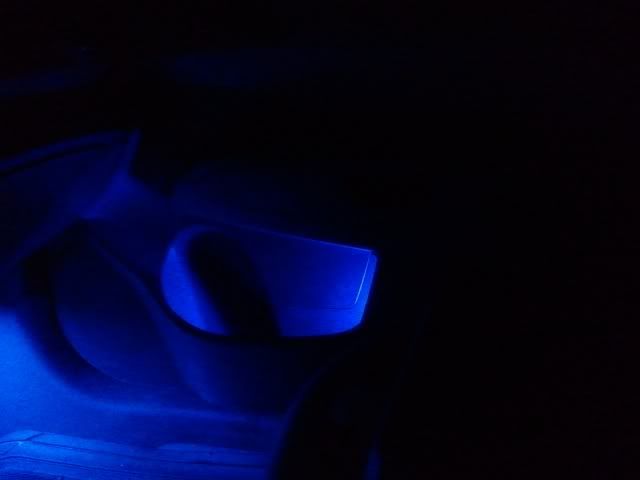
Step 3. Place your LED strips (or other Light sources)
Remember the location of the barrier strips so that you orientate the strips the correct way.
Step 4. Wire set up.
Run the Wires from the LED's to the Barrier blocks. Should be 2 per light source. On the autozone strips they come with wires, these can be long enough to make it to the barrier block, If not use additional wire. Try to keep the colors combo something easy to remember ( Red for positive, Black for negative, Green for ground)
If no wire is to be added from the LED's simply place the terminal spade ends on the end of the wire and crimp. To do this expose roughly 1/8 inch of wire and place it in the terminal all the way to the stopping point, usually a piece of metal will stop it from going after a set point, Ensure the exposed wire is touching the metal inside the terminal end before you crimp it.
If Wire is needed to be added, make sure to splice it correctly and securely. I personally like to use connectors that you crimp each wire to, other options are wire nuts, solder, and just splicing, either way make sure no portion of wire is exposed after the connection and that it cant simply be pulled apart with small amounts of force.
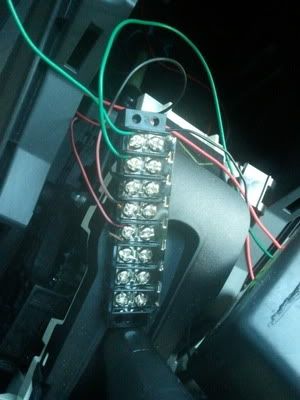
Step 5. Set up barrier blocks. I positioned mine on either side of the gear selector, Positive on one Negative on the other.
Take one block and loosen the screws on one side, place the jumper under the screws and tighten them back down. This will allow one wire to provide power to each screw. Do this step for both blocks.
Step 6. attach LED wires to the barrier block. Remember to keep the top slot on the positive block and the top two slots on the negative barrier block open.
Positive

Negative
Note Green is ground for switch and the block, black is negative wires from LED's
Step 7. place the switch. First mount the switch as you wish, I personally cut a hole below the HVAC in the removed trim from step two so that the switch linked will git inside the cubby and is removed from sight but accessible. Remember the further from the barrier blocks, the more wire to run.
Step 8. wire the switch. Your switch will vary on make and should come with a wire diagram or sorts to say which stem goes to what. Powered switched like the one i linked goes power in, power out, negative. just remember which is which.
First wire the power out from the switch to the barrier block using the same method as wiring the LED's to the block, the power source from the switch should go into the first slot of the positive barrier block for easy trouble shooting.
Second Wire the negative side to the negative block, using the second slot for easy trouble shooting.
Step 9. Provide power to switch.
Take your add a fuse and place 2 10amp fuses into it.
Add wire to the add a fuse long enough to reach the switch. crimp or splice as needed to provide a secure connection from add a fuse to the wire.
Locate the Cigarette lighter fuse (labeled Cigar as far as i can tell) it too should be 10 amps. Pull the fuse with the needle nose pliers and place the added fuse line.
Run the wire to the switch and connect it to the switch's power in terminal using the appropriate ends on the wire.
Step 10. Ground the whole thing.
Simple step, find a nice big bolt connecting to the frame that has no paint, people have suggested the ebrake, and this will allow less wire to be used, i ran more wire to the fuse box and used a bolt there. either way any bolt that goes to bare unpainted metal that goes to the frame counts.
Take run a wire from this bolt to the negative barrier block. Connect it with the appropriate ends just like the rest of the wires and this should go into the top slot for easy trouble shooting.
Step 11. test the lights.
All things considered you should have ran power from the fuse box (or splice) and completed plenty of circuits to power all the lights. If the lights do not turn on make sure everything is complete.
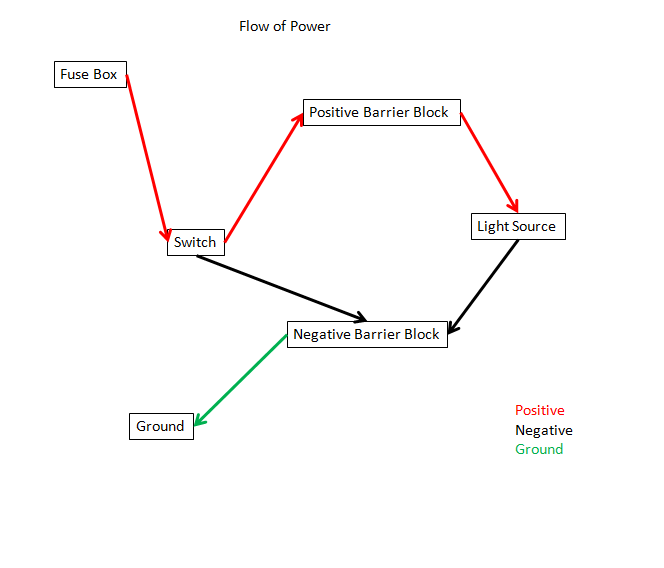
Reference the picture for flow of power or w/e the technical term is
Troubleshooting Tips:
1: ensure you are getting power to the cigarette lighter, this will require the car to be in accessory mode or on. the lights will not work without this.
2: ensure the switch is on.
3: ensure all connections are made correctly.
4: seek google/professional help.
More photos available upon request. This should be a little more specific then the original Write up. less pictures more words.
Tools/Material needed
Wire cutter
Wire crimper
Wire ends
(The Above usually can be bought in a kit)
Needle Nose Pliers
10 Amp Fuse
LED light Strips 12v
Add a Fuse
Wire (18-20 gauge)
Barrier Strips
Jumper
Switch
Before you start have a plan, Determine how you want the led's to sit and look, how many LED strips you want to use. Make sure they will sit how you want them to before you start so that you know before hand if there is any placement issues. Another thing to consider is the location you want the barrier strips to sit,set,mount to. I chose the center console as it is the center and has plenty of room, Manual cars may need to adjust.
All steps are how i figured out how to wire these and may not be the best, most efficient or smartest way to do so. I cannot say i didnt blow fuses and that im an expert at the way this **** works.
I will not tap wires in my new car so this guide avoids it instead opting to add a fused connection, you can avoid all those steps by simply splicing into a 12 volt like if you wish like the cigarette lighter which i will be tapping at the fuse.
The Steps:
Step 1: Disconnect the battery (this avoids shock and destruction if you pull the wrong fuse.
Step 2. Remove applicable trim. I removed the center console trim around the gear selector, the trim below the steering wheel, and the fuse box.
To remove the trim around the gear box just simply grab the cubby below the HVAC and pull it will pop out.
To remove the trim below the steering wheel just remove all screws and then pull, clips hold it in, Beware airbag. If you dont want to you can skip this one.
To remove trim around the fuse box, find the handle and pull.
Step 3. Place your LED strips (or other Light sources)
Remember the location of the barrier strips so that you orientate the strips the correct way.
Step 4. Wire set up.
Run the Wires from the LED's to the Barrier blocks. Should be 2 per light source. On the autozone strips they come with wires, these can be long enough to make it to the barrier block, If not use additional wire. Try to keep the colors combo something easy to remember ( Red for positive, Black for negative, Green for ground)
If no wire is to be added from the LED's simply place the terminal spade ends on the end of the wire and crimp. To do this expose roughly 1/8 inch of wire and place it in the terminal all the way to the stopping point, usually a piece of metal will stop it from going after a set point, Ensure the exposed wire is touching the metal inside the terminal end before you crimp it.
If Wire is needed to be added, make sure to splice it correctly and securely. I personally like to use connectors that you crimp each wire to, other options are wire nuts, solder, and just splicing, either way make sure no portion of wire is exposed after the connection and that it cant simply be pulled apart with small amounts of force.
Step 5. Set up barrier blocks. I positioned mine on either side of the gear selector, Positive on one Negative on the other.
Take one block and loosen the screws on one side, place the jumper under the screws and tighten them back down. This will allow one wire to provide power to each screw. Do this step for both blocks.
Step 6. attach LED wires to the barrier block. Remember to keep the top slot on the positive block and the top two slots on the negative barrier block open.
Positive
Negative
Note Green is ground for switch and the block, black is negative wires from LED's
Step 7. place the switch. First mount the switch as you wish, I personally cut a hole below the HVAC in the removed trim from step two so that the switch linked will git inside the cubby and is removed from sight but accessible. Remember the further from the barrier blocks, the more wire to run.
Step 8. wire the switch. Your switch will vary on make and should come with a wire diagram or sorts to say which stem goes to what. Powered switched like the one i linked goes power in, power out, negative. just remember which is which.
First wire the power out from the switch to the barrier block using the same method as wiring the LED's to the block, the power source from the switch should go into the first slot of the positive barrier block for easy trouble shooting.
Second Wire the negative side to the negative block, using the second slot for easy trouble shooting.
Step 9. Provide power to switch.
Take your add a fuse and place 2 10amp fuses into it.
Add wire to the add a fuse long enough to reach the switch. crimp or splice as needed to provide a secure connection from add a fuse to the wire.
Locate the Cigarette lighter fuse (labeled Cigar as far as i can tell) it too should be 10 amps. Pull the fuse with the needle nose pliers and place the added fuse line.
Run the wire to the switch and connect it to the switch's power in terminal using the appropriate ends on the wire.
Step 10. Ground the whole thing.
Simple step, find a nice big bolt connecting to the frame that has no paint, people have suggested the ebrake, and this will allow less wire to be used, i ran more wire to the fuse box and used a bolt there. either way any bolt that goes to bare unpainted metal that goes to the frame counts.
Take run a wire from this bolt to the negative barrier block. Connect it with the appropriate ends just like the rest of the wires and this should go into the top slot for easy trouble shooting.
Step 11. test the lights.
All things considered you should have ran power from the fuse box (or splice) and completed plenty of circuits to power all the lights. If the lights do not turn on make sure everything is complete.
Reference the picture for flow of power or w/e the technical term is
Troubleshooting Tips:
1: ensure you are getting power to the cigarette lighter, this will require the car to be in accessory mode or on. the lights will not work without this.
2: ensure the switch is on.
3: ensure all connections are made correctly.
4: seek google/professional help.
More photos available upon request. This should be a little more specific then the original Write up. less pictures more words.
Last edited: