here goes my attempt at another DIY: this time its trim
helpful tools are:
Trim Removal Tools
Socket Set
Screwdrivers
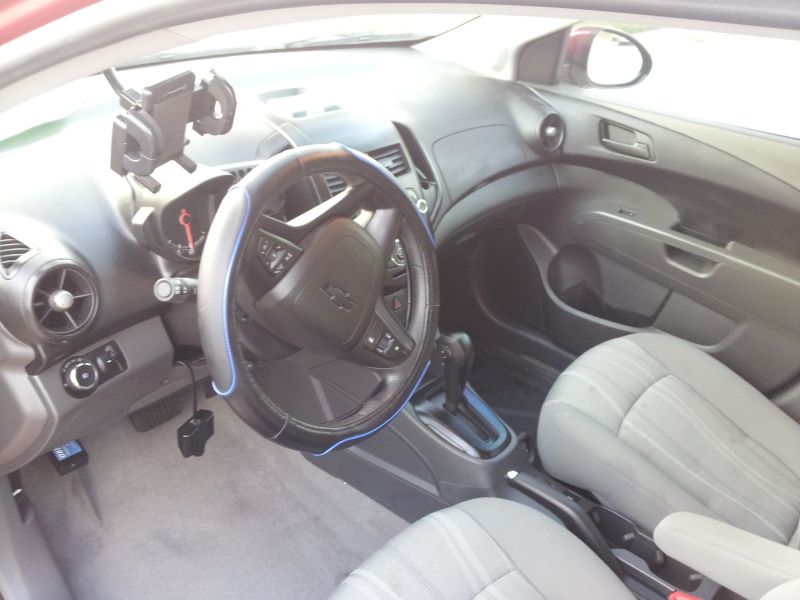
I guess as most other trim starts here we shall start with center console/radio parts and work our way from there.
here you will see the cubby holes on either side of the radio. Remove the triangle piece on the bottom by simply pulling.
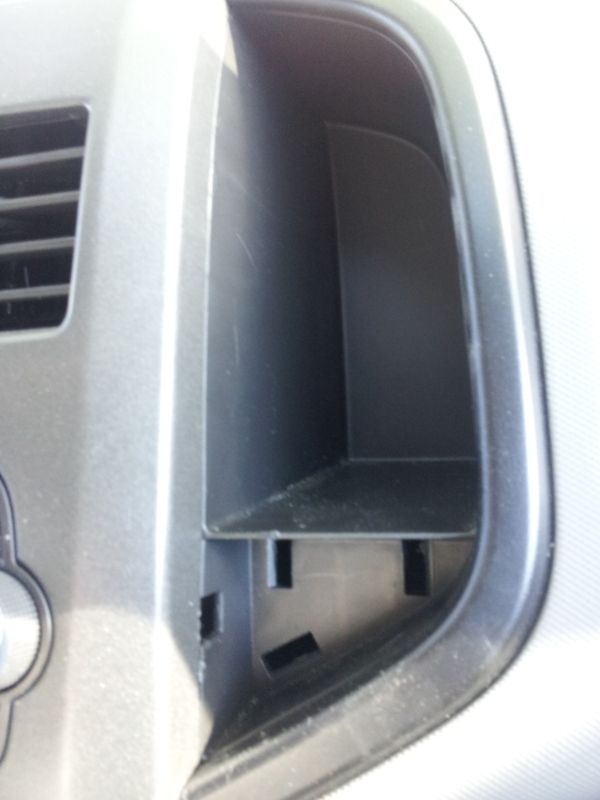
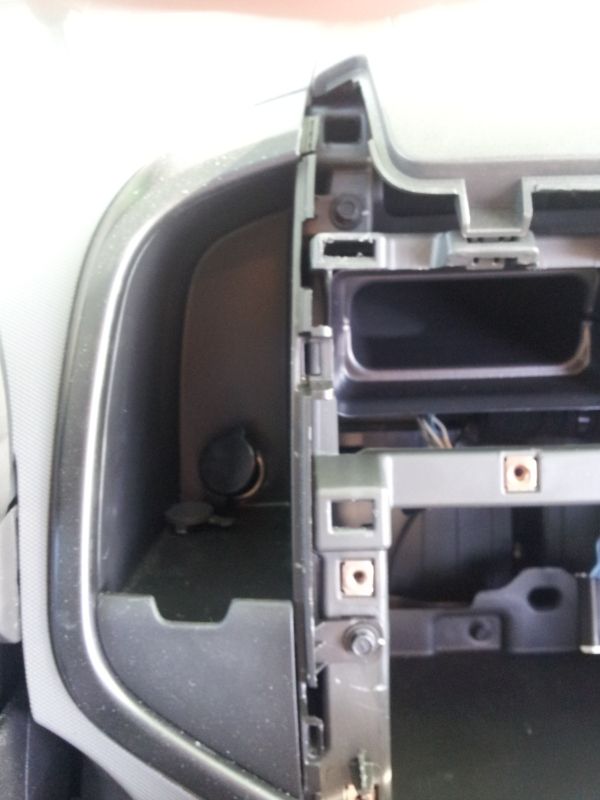
This reveals a hole on either side of the radio trim, now use the trim removal tool or a screwdriver (the screwdriver can mark the trim be careful) and pry the trim up, once u can grab it you can pull it off. this then reveals the radio mounts, HVAC mounts, cubby mounts and gives you the ability to pull the top bin off as well.
Pic place holder
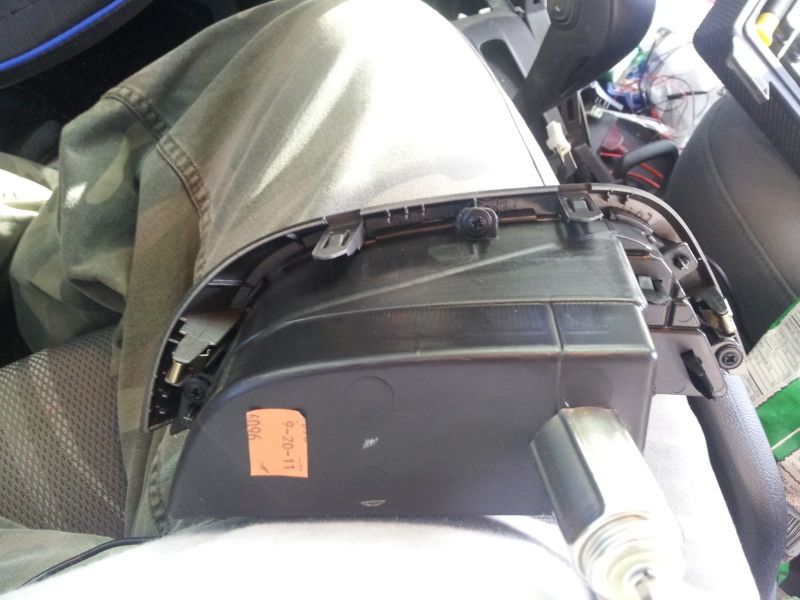
Next trim is the radio and cubbys. To remove the radio just remove the 4 screws (bolt size not remembered) and it pulls out, remove the harnesses associated with your radio and that is is. to remove the cubbys you need to at least pull the radio up to allow access to the 2 mounting screws. after these are removed you just need to pull them out. You can further take these apart if you like to work on the light grey trim around the outside with 4 screws on the back side.
Now that you have the cubbys removed you can work on the Light grey trim pieces on the dash. Sadly the ones on teh door are melted? (i wouldnt suggest removing the plastic pieces unless you know what you are doing)
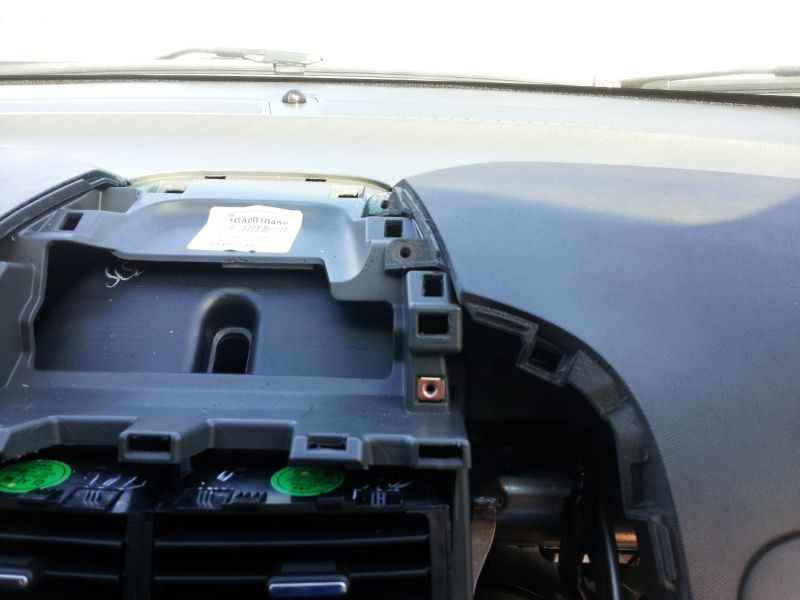
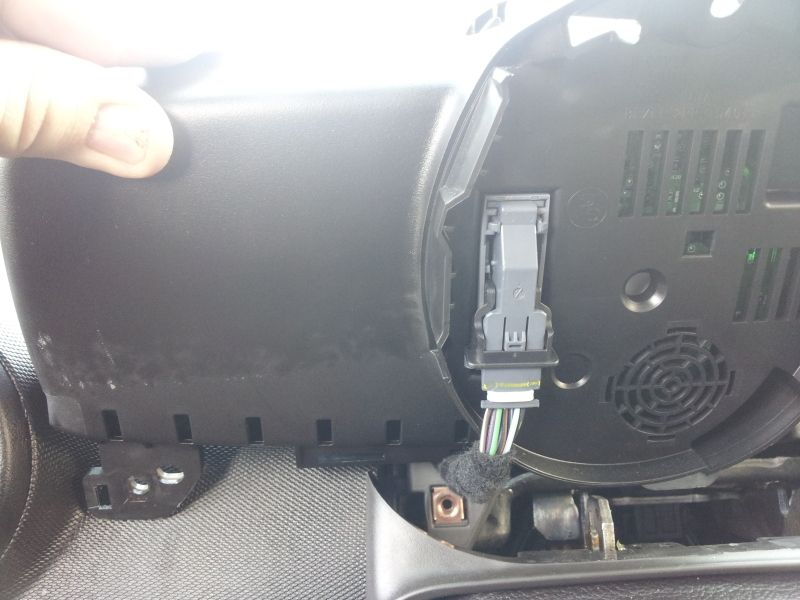
to remove these trim pieces all you need to do with the current trim parts removed remove the associated screws bolts. The right side has 2 screws under the top trey that have to come out, one screw on the side under the the trim piece by the door and then the air bag support bolts and harness ( these are behind the glove box, removed by pulling the support on the right side then pull up). once these are removed the trim should pop out, be careful with the air vent as it can pop off, if this happens usually for me the ring would pop off and then vent would stay in the frame, just take the vent and the ring and place them back together and then when replacing the trim just place in threw the hole on the trim with the up side up (its marked) and it should snap back into place. if you try to "sandwich" the vent and the ring around the trim it is far more difficult if possible.

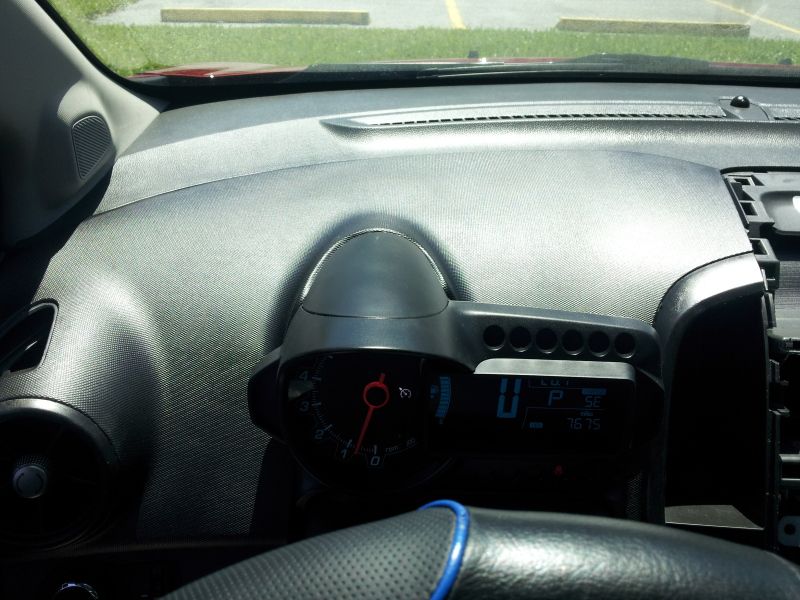
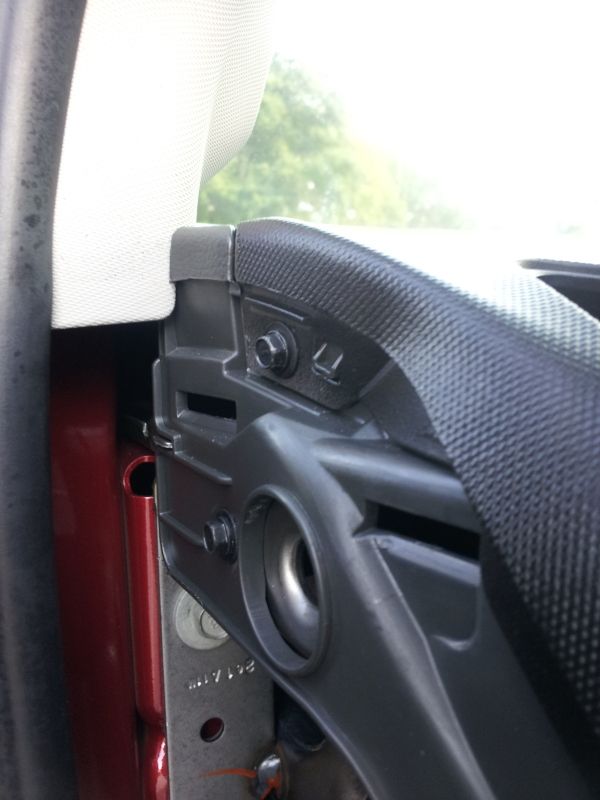
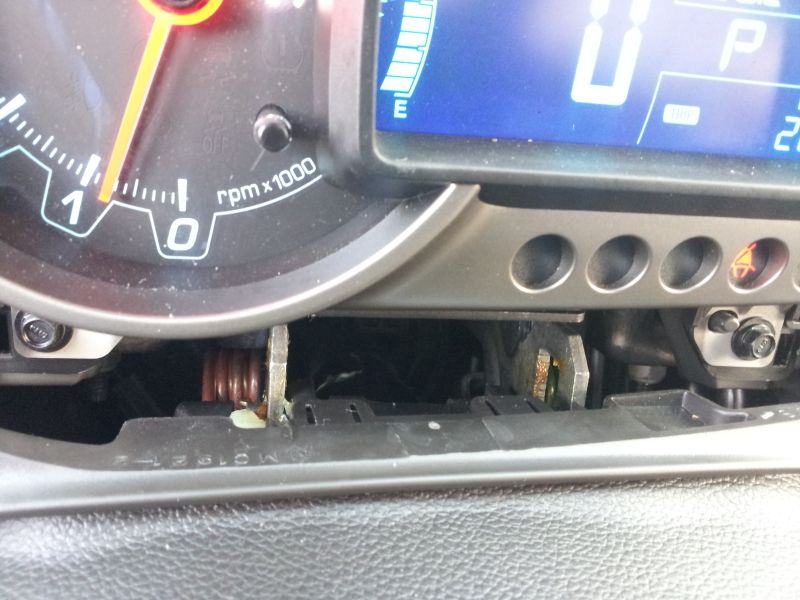
For the left trim you will need to remove the Speedometer and the bolt on the left side by the door, same location as the right just different door. To remove the speedometer just pop the back plastic cover on the speedometer shouldn't take much force but you may need a tool of your choosing, i used a tiny screwdriver. Once this piece is removed it will reveal one of three screws. after that remove the cover on t he bottom of the speedometer by pulling it forward (you may need to readjust wheel for this whole step) thus revealing the final two screws. After this is done it should reveal the harness, remove this and it should allow for the whole trim piece to pop up.
The next trim piece is the HVAC
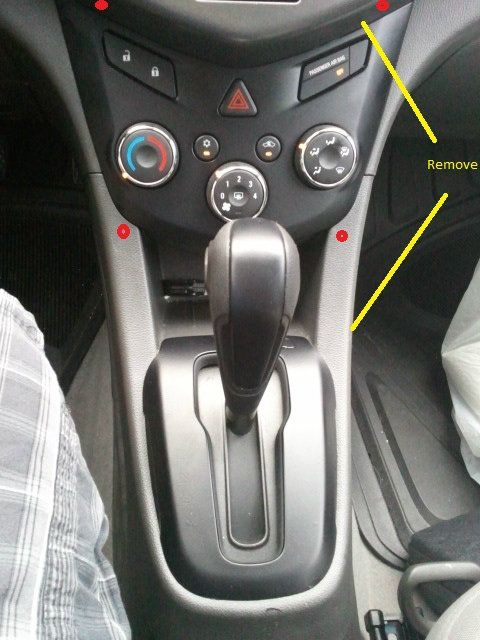
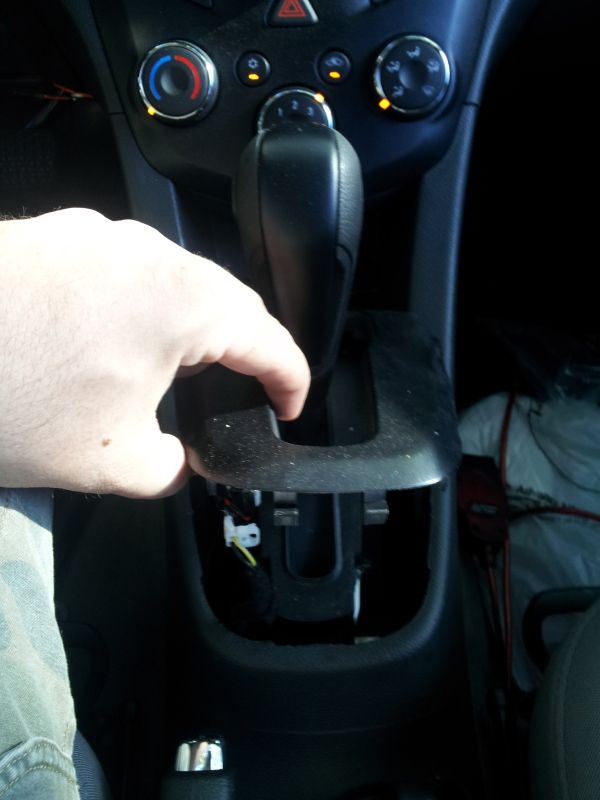
the only part needed to remove this is the radio trim to reveal two out of four bolts and the center console trim to reveal the remaining two bolts. To remove the center console trim just grab the trim and pull it up, i find it easiest to place the car in neutral and sometimes remove the trim around the gear selector which also just pulls off.
after these two parts are removed and the bolts revealed are removed then hvac should have a few harnesses to be removed, these can be very touchy if done improperly so ill say how i done it and take it from there.
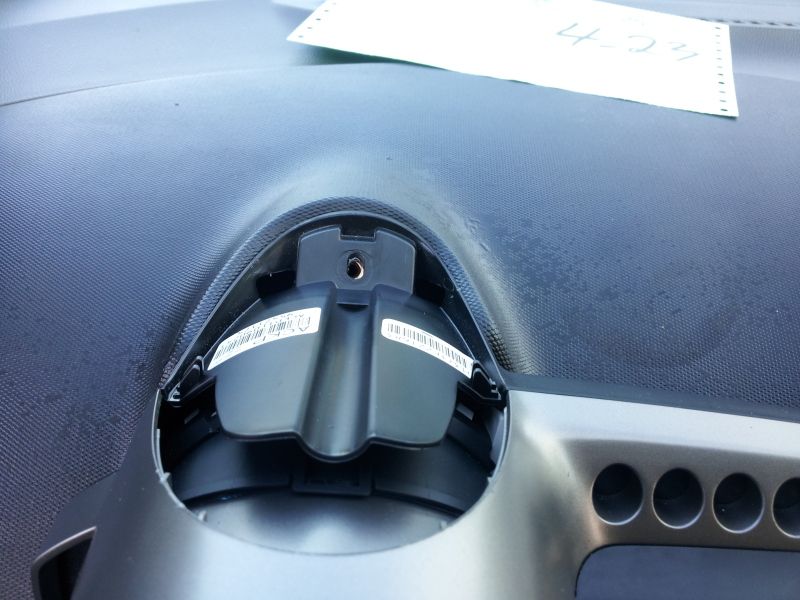
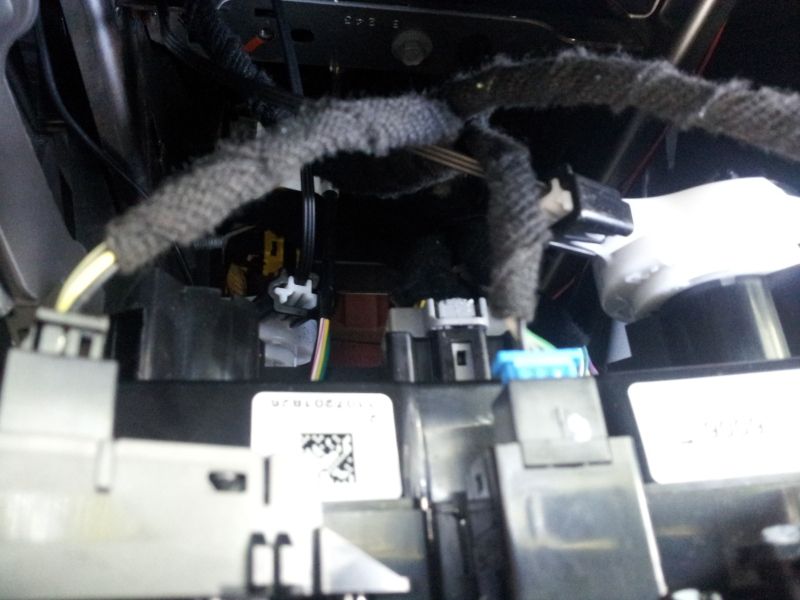
I remove all of the wires on the top first, use a screw driver or any tool you feel comfortable with and depress the tabs on the sides of each wire and pull, then do the same on the bottom three wires these can be done with your hands, and after that remove the two cables by depressing a tab on both the top and bottom of the housing, the whole white circle should come out. after that if you plan to paint/wrap the trim each button and knob comes out with 2 screws on the top and 4 around the bottom part.
Next is the steering wheel trim. turn the steering wheel upside down so that the bottom is accessible. after this I advice to disconnect the battery unless you like airbags to the face. after this is done you should see two holes in the back, with a screw driver or other object that will fit feel for 2 bars that you can move t words the inside (if im not mistaken, may be outside) this will allow the airbag to be removed. i found it easiest to pull up on the airbag as i depressed it then move to the other side and repeat. Once the airbag is removed it allows access to the trim (you can remove the bag its self but i do not feel comfortable enough to try how so good luck if thats your intent).
to remove the trim all you have to do is carefully pull it up, this includes the switches if you have any and if not the fillers, i started with the bottom, got that off then pulled the switches due to the fragile state of the actually grey trim piece. no screws are holding this into the wheel just plastic plugs and a harness if you have switches. on the back side you can remove the buttons with screws.
Now we can work on parts containing speakers
The a pillars are simple, just pull them off and remove the plastic connector on the back, if you have the premium speaker system you will need to remove the wires for this as well.
The doors are removed by first pulling the associated plastic cover ( one in the corner on each door by the front of the window, covering the mirrors on the front and by the b pillars on the back. once these are removed there is just 2 screws holding all 4 doors on ( 2 on each door) one is behind a plastic cover behind the handle and the other is behind a plastic cover behind the latch. remove these 2 screws and then the door pops off and lift up to pull it off the window sill/lock.
All of these steps are reversible to replace the trim, the only issues you should run into is if you leave the battery plugged in while working on the airbag, or if you remove the airbag harness on the right side trim and/or the speedometer while the car is on, you will also loose any hvac use while that is removed.
Any errors (grammar/spelling/technical), suggestions, pictures, questions or bolt sizes for the trim is welcomed as im not perfect just close enough
helpful tools are:
Trim Removal Tools
Socket Set
Screwdrivers
I guess as most other trim starts here we shall start with center console/radio parts and work our way from there.
here you will see the cubby holes on either side of the radio. Remove the triangle piece on the bottom by simply pulling.
This reveals a hole on either side of the radio trim, now use the trim removal tool or a screwdriver (the screwdriver can mark the trim be careful) and pry the trim up, once u can grab it you can pull it off. this then reveals the radio mounts, HVAC mounts, cubby mounts and gives you the ability to pull the top bin off as well.
Pic place holder
Next trim is the radio and cubbys. To remove the radio just remove the 4 screws (bolt size not remembered) and it pulls out, remove the harnesses associated with your radio and that is is. to remove the cubbys you need to at least pull the radio up to allow access to the 2 mounting screws. after these are removed you just need to pull them out. You can further take these apart if you like to work on the light grey trim around the outside with 4 screws on the back side.
Now that you have the cubbys removed you can work on the Light grey trim pieces on the dash. Sadly the ones on teh door are melted? (i wouldnt suggest removing the plastic pieces unless you know what you are doing)
to remove these trim pieces all you need to do with the current trim parts removed remove the associated screws bolts. The right side has 2 screws under the top trey that have to come out, one screw on the side under the the trim piece by the door and then the air bag support bolts and harness ( these are behind the glove box, removed by pulling the support on the right side then pull up). once these are removed the trim should pop out, be careful with the air vent as it can pop off, if this happens usually for me the ring would pop off and then vent would stay in the frame, just take the vent and the ring and place them back together and then when replacing the trim just place in threw the hole on the trim with the up side up (its marked) and it should snap back into place. if you try to "sandwich" the vent and the ring around the trim it is far more difficult if possible.
For the left trim you will need to remove the Speedometer and the bolt on the left side by the door, same location as the right just different door. To remove the speedometer just pop the back plastic cover on the speedometer shouldn't take much force but you may need a tool of your choosing, i used a tiny screwdriver. Once this piece is removed it will reveal one of three screws. after that remove the cover on t he bottom of the speedometer by pulling it forward (you may need to readjust wheel for this whole step) thus revealing the final two screws. After this is done it should reveal the harness, remove this and it should allow for the whole trim piece to pop up.
The next trim piece is the HVAC
the only part needed to remove this is the radio trim to reveal two out of four bolts and the center console trim to reveal the remaining two bolts. To remove the center console trim just grab the trim and pull it up, i find it easiest to place the car in neutral and sometimes remove the trim around the gear selector which also just pulls off.
after these two parts are removed and the bolts revealed are removed then hvac should have a few harnesses to be removed, these can be very touchy if done improperly so ill say how i done it and take it from there.
I remove all of the wires on the top first, use a screw driver or any tool you feel comfortable with and depress the tabs on the sides of each wire and pull, then do the same on the bottom three wires these can be done with your hands, and after that remove the two cables by depressing a tab on both the top and bottom of the housing, the whole white circle should come out. after that if you plan to paint/wrap the trim each button and knob comes out with 2 screws on the top and 4 around the bottom part.
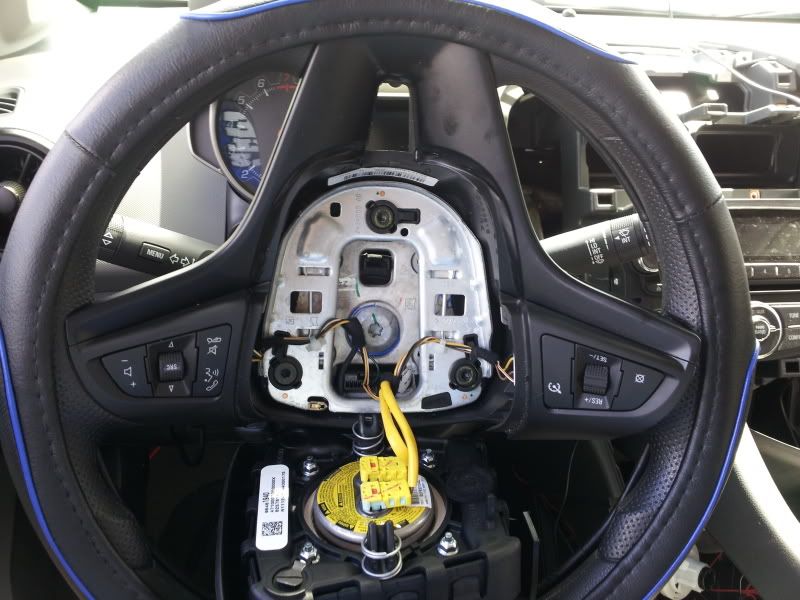
Next is the steering wheel trim. turn the steering wheel upside down so that the bottom is accessible. after this I advice to disconnect the battery unless you like airbags to the face. after this is done you should see two holes in the back, with a screw driver or other object that will fit feel for 2 bars that you can move t words the inside (if im not mistaken, may be outside) this will allow the airbag to be removed. i found it easiest to pull up on the airbag as i depressed it then move to the other side and repeat. Once the airbag is removed it allows access to the trim (you can remove the bag its self but i do not feel comfortable enough to try how so good luck if thats your intent).
to remove the trim all you have to do is carefully pull it up, this includes the switches if you have any and if not the fillers, i started with the bottom, got that off then pulled the switches due to the fragile state of the actually grey trim piece. no screws are holding this into the wheel just plastic plugs and a harness if you have switches. on the back side you can remove the buttons with screws.
Now we can work on parts containing speakers
The a pillars are simple, just pull them off and remove the plastic connector on the back, if you have the premium speaker system you will need to remove the wires for this as well.
The doors are removed by first pulling the associated plastic cover ( one in the corner on each door by the front of the window, covering the mirrors on the front and by the b pillars on the back. once these are removed there is just 2 screws holding all 4 doors on ( 2 on each door) one is behind a plastic cover behind the handle and the other is behind a plastic cover behind the latch. remove these 2 screws and then the door pops off and lift up to pull it off the window sill/lock.
All of these steps are reversible to replace the trim, the only issues you should run into is if you leave the battery plugged in while working on the airbag, or if you remove the airbag harness on the right side trim and/or the speedometer while the car is on, you will also loose any hvac use while that is removed.
Any errors (grammar/spelling/technical), suggestions, pictures, questions or bolt sizes for the trim is welcomed as im not perfect just close enough
") )
)