SonicHedghog
New member
So I wanted to install a sub in my hatchback but did not want to use the trunk space. I use it a lot and didn't want that area taken up by a sub, so I decided to mount one under the driver seat. This is personal preference and not everyone will like it, but it works well for me.
Tools needed for the job:
All the parts I purchased for the job:

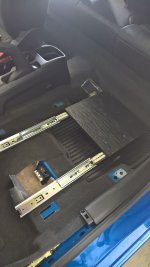
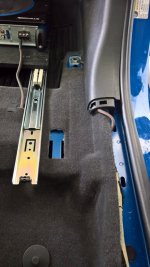
Here is a picture of the end result for now
Step one:
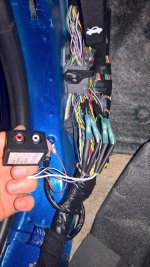
Remove everything in the way. We will start with the driver seat and then move to the panels. You will need a T-50 star bit for the seat bolts. There are only two bolts holding the seat down and are located in the rear of the seat bracket. Shown here:

 You will have to remove this plastic cover to get to the screw.
Next take off the panel. It is one whole piece and has about 4 clips holding it in. Now comes the hard part of making a hole for the power cable to come through the firewall. The material around the original cables is rubber. Use an electric drill with an extension to get to the correct spot. After through the rubber, cut the excess away with a knife.
 Engine Bay
 Car interior
Step two:
Now that everything is out of the way we can start getting it all prepped. First we are going to mount the circuit breaker just inside the engine bay on the plastic molding.


Next find out where you want to get power from the battery and check how big the bolt is. After sliding some heat shrink tubing on, then crimp the correct size heavy-duty lug to one end of the power cable.
DO NOT CONNECT IT TO THE BATTERY YET. Hopefully you know that...
We are going to cut about 10 inches down from the side the lug is already on. This is where you will connect the circuit breaker.

I am still writing up the whole process with pictures. coming soon.
Tools needed for the job:
- Philips screwdriver/Flat blade screwdriver
- Utility Knife (steak knife)
- Soldering Iron
- Wire cutters
- Wire Strippers
- Needle nose pliers
- Flashlight
- Panel tool/Retaining clip remover
- Electrical tape
- Socket wrench and sockets
- Electric drill and bits
- Heat gun (hairdryer)
- Heat shrink tubing
- Lug crimper tool
- Screws
All the parts I purchased for the job:
- Marine grade heavy-duty lugs - 1/2 in. and 1/4 in. rings
- Speaker cable to RCA adapter with line out converter
- Complete 8 gauge amp install kit
- 50 amp in-line circuit breaker
- 8" 600 watt low profile active powered car subwoofer
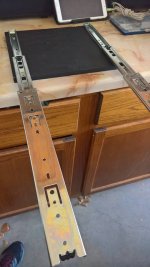
- Side mount drawer slide hardware
- Foam tape
- A piece of wood (for mounting)
Here is a picture of the end result for now
Step one:
Remove everything in the way. We will start with the driver seat and then move to the panels. You will need a T-50 star bit for the seat bolts. There are only two bolts holding the seat down and are located in the rear of the seat bracket. Shown here:
Next take off the panel. It is one whole piece and has about 4 clips holding it in. Now comes the hard part of making a hole for the power cable to come through the firewall. The material around the original cables is rubber. Use an electric drill with an extension to get to the correct spot. After through the rubber, cut the excess away with a knife.
Step two:
Now that everything is out of the way we can start getting it all prepped. First we are going to mount the circuit breaker just inside the engine bay on the plastic molding.
Next find out where you want to get power from the battery and check how big the bolt is. After sliding some heat shrink tubing on, then crimp the correct size heavy-duty lug to one end of the power cable.
DO NOT CONNECT IT TO THE BATTERY YET. Hopefully you know that...
We are going to cut about 10 inches down from the side the lug is already on. This is where you will connect the circuit breaker.
I am still writing up the whole process with pictures. coming soon.
Last edited: