BrianH
New member
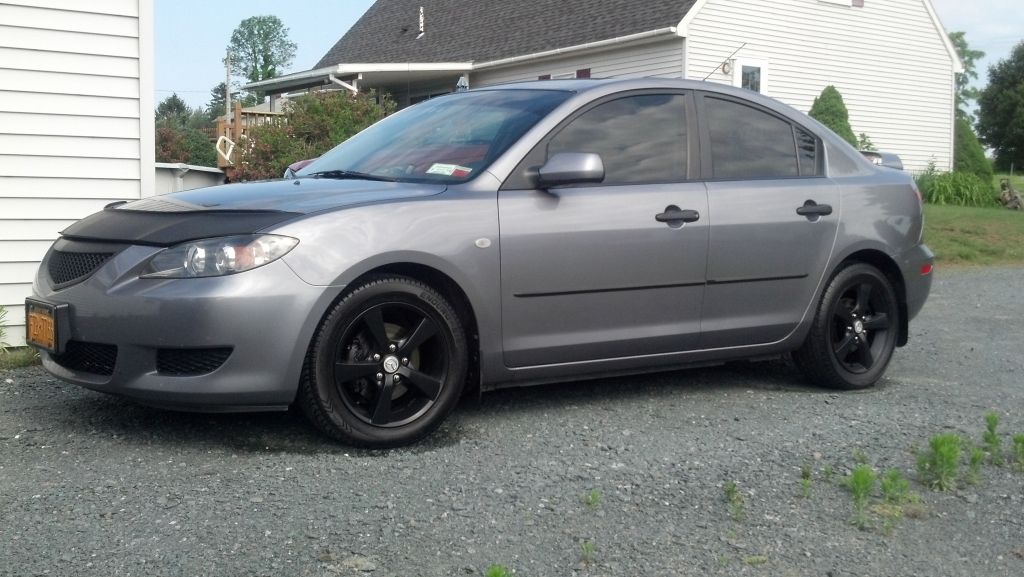
Because I've been asked tons of times about my wheels, I decided to just make a DIY article about them.

For starters, it's best if you simply take your wheels off to do this. I'd imagine it could be possible to do while they're still on the vehicle, but then you'd have to paint over the center cap and lugs and it wouldn't look the same. It's a pretty simple process to take them off, so I see no reason not to.
Clean the wheel off. I'm only focusing on the front surface, so it's not necessary to clean the inside's unless you really want to, but it wouldn't hurt otherwise.


Pop off the center caps. I thought they look more aggressive if the center caps weren't painted, so I just popped them off beforehand. They're only attached by clips and easily removable (although, they are on a little tight).

Masking the area is one of the most crucial parts to this whole process. If you don't get this right, the end result will not look good. Use low tack painter's tape ($2.50/roll from Walmart) and mask around the whole wheel. There are a couple areas you'll want to be concerned with. The curves around the inside center of the wheel are hard to get right. You'll want to make sure you don't let the tape fold into itself, because you need the tape to be sticking on the wheel to produce a crisp edge. Try to do the curves on each spoke with 1 continuous piece of tape. This will really help when it comes time to remove.

Put the tape on first, and then add the newspaper afterwards. Once you have the masking on, adding the paper in between the spokes is pretty simple. Lift the outside edges of the tape and push the paper underneath. This is done to prevent overspray. Don't worry about the spoke ends on the tire, because overspray on the tire is easy to rub off.
Once you have the masking done, before you begin with the plastidip, double check that your masking is pressed firmly against the wheel. I usually run my thumbnail along the edges to make sure the tape is secured and not bulging in any areas.
Now it's time to spray on the paint. You're going to want to do this quickly and evenly. Start with quick dusting and then begin laying on the layers. Do not stop painting to let it dry in between layers. This stuff dries pretty quick.
Once you have about 3-4 layers on, stop painting and immediately start removing the masking. You'll want pull the tape off at a sharp angle, at a moderate and steady pace.
Once the masking is off, set the tire aside to let dry for about 10-15 minutes. I also reattached the center caps shortly after I set them aside. Reattach them to the vehicle and that's it! Something to note when putting them back onto the car is that you don't want to tighten the lugs too fast. Some of them are going to peel the very back inside plastidip where the lugs sit against the wheel, you'll just have to accept that no one is going to see it. And be careful not to hit your tools off the plastidip, otherwise you may end up having unwanted scratches in the paint.
Hope this helps anyone who's interested in doing this themselves. Feel free to leave comments below. You can check out more pics of the car and wheels here: http://www.sonicownersforum.com/forum/t3318/

For starters, it's best if you simply take your wheels off to do this. I'd imagine it could be possible to do while they're still on the vehicle, but then you'd have to paint over the center cap and lugs and it wouldn't look the same. It's a pretty simple process to take them off, so I see no reason not to.
Clean the wheel off. I'm only focusing on the front surface, so it's not necessary to clean the inside's unless you really want to, but it wouldn't hurt otherwise.
Pop off the center caps. I thought they look more aggressive if the center caps weren't painted, so I just popped them off beforehand. They're only attached by clips and easily removable (although, they are on a little tight).
Masking the area is one of the most crucial parts to this whole process. If you don't get this right, the end result will not look good. Use low tack painter's tape ($2.50/roll from Walmart) and mask around the whole wheel. There are a couple areas you'll want to be concerned with. The curves around the inside center of the wheel are hard to get right. You'll want to make sure you don't let the tape fold into itself, because you need the tape to be sticking on the wheel to produce a crisp edge. Try to do the curves on each spoke with 1 continuous piece of tape. This will really help when it comes time to remove.
Put the tape on first, and then add the newspaper afterwards. Once you have the masking on, adding the paper in between the spokes is pretty simple. Lift the outside edges of the tape and push the paper underneath. This is done to prevent overspray. Don't worry about the spoke ends on the tire, because overspray on the tire is easy to rub off.
Once you have the masking done, before you begin with the plastidip, double check that your masking is pressed firmly against the wheel. I usually run my thumbnail along the edges to make sure the tape is secured and not bulging in any areas.
Now it's time to spray on the paint. You're going to want to do this quickly and evenly. Start with quick dusting and then begin laying on the layers. Do not stop painting to let it dry in between layers. This stuff dries pretty quick.
Once you have about 3-4 layers on, stop painting and immediately start removing the masking. You'll want pull the tape off at a sharp angle, at a moderate and steady pace.
Once the masking is off, set the tire aside to let dry for about 10-15 minutes. I also reattached the center caps shortly after I set them aside. Reattach them to the vehicle and that's it! Something to note when putting them back onto the car is that you don't want to tighten the lugs too fast. Some of them are going to peel the very back inside plastidip where the lugs sit against the wheel, you'll just have to accept that no one is going to see it. And be careful not to hit your tools off the plastidip, otherwise you may end up having unwanted scratches in the paint.
Hope this helps anyone who's interested in doing this themselves. Feel free to leave comments below. You can check out more pics of the car and wheels here: http://www.sonicownersforum.com/forum/t3318/
")